Last Monday began our spring break. Michael and the boys left for the week to go camping and I had a long list of things I wanted to get done. The first of which was making homemade soap with my dear friend Nancy.
In the past we have always made soap at Nancy’s house. I wanted to use my canning kitchen and so Nancy and her husband Richard drove down for the day.
Why make soap when you can just buy soap? Well, first of all Nicholas has eczema and he can’t use anything on his skin that has fragrance or coloring. Second of all I have access to Nigerian Goat milk which averages 6% – 8% butterfat. That high fat content increases the moisturizing nature of the soap.
Another thing that makes homemade soap so nice is that it still has glycerin in it. Glycerin helps maintain moisture in the skin throughout the day. Soap manufacturing companies remove the glycerin and put it in cream and lotions. In effect they are making the soap not as moisturizing but giving you opportunities to purchase lotions and creams to add moisture back to your skin. Store bought soap is more like detergent.
There are some great websites out there that help with soap making . You can purchase supplies, watch “how-to” videos, find proven recipes, etc. My two favorite sites are: Soap Making Resource and Bramble Berry. I found my goat milk recipe at Soap Making Resources and then found a really boring three oil, milk, lye recipe from somewhere else. That recipe will be the soap for Nicholas.
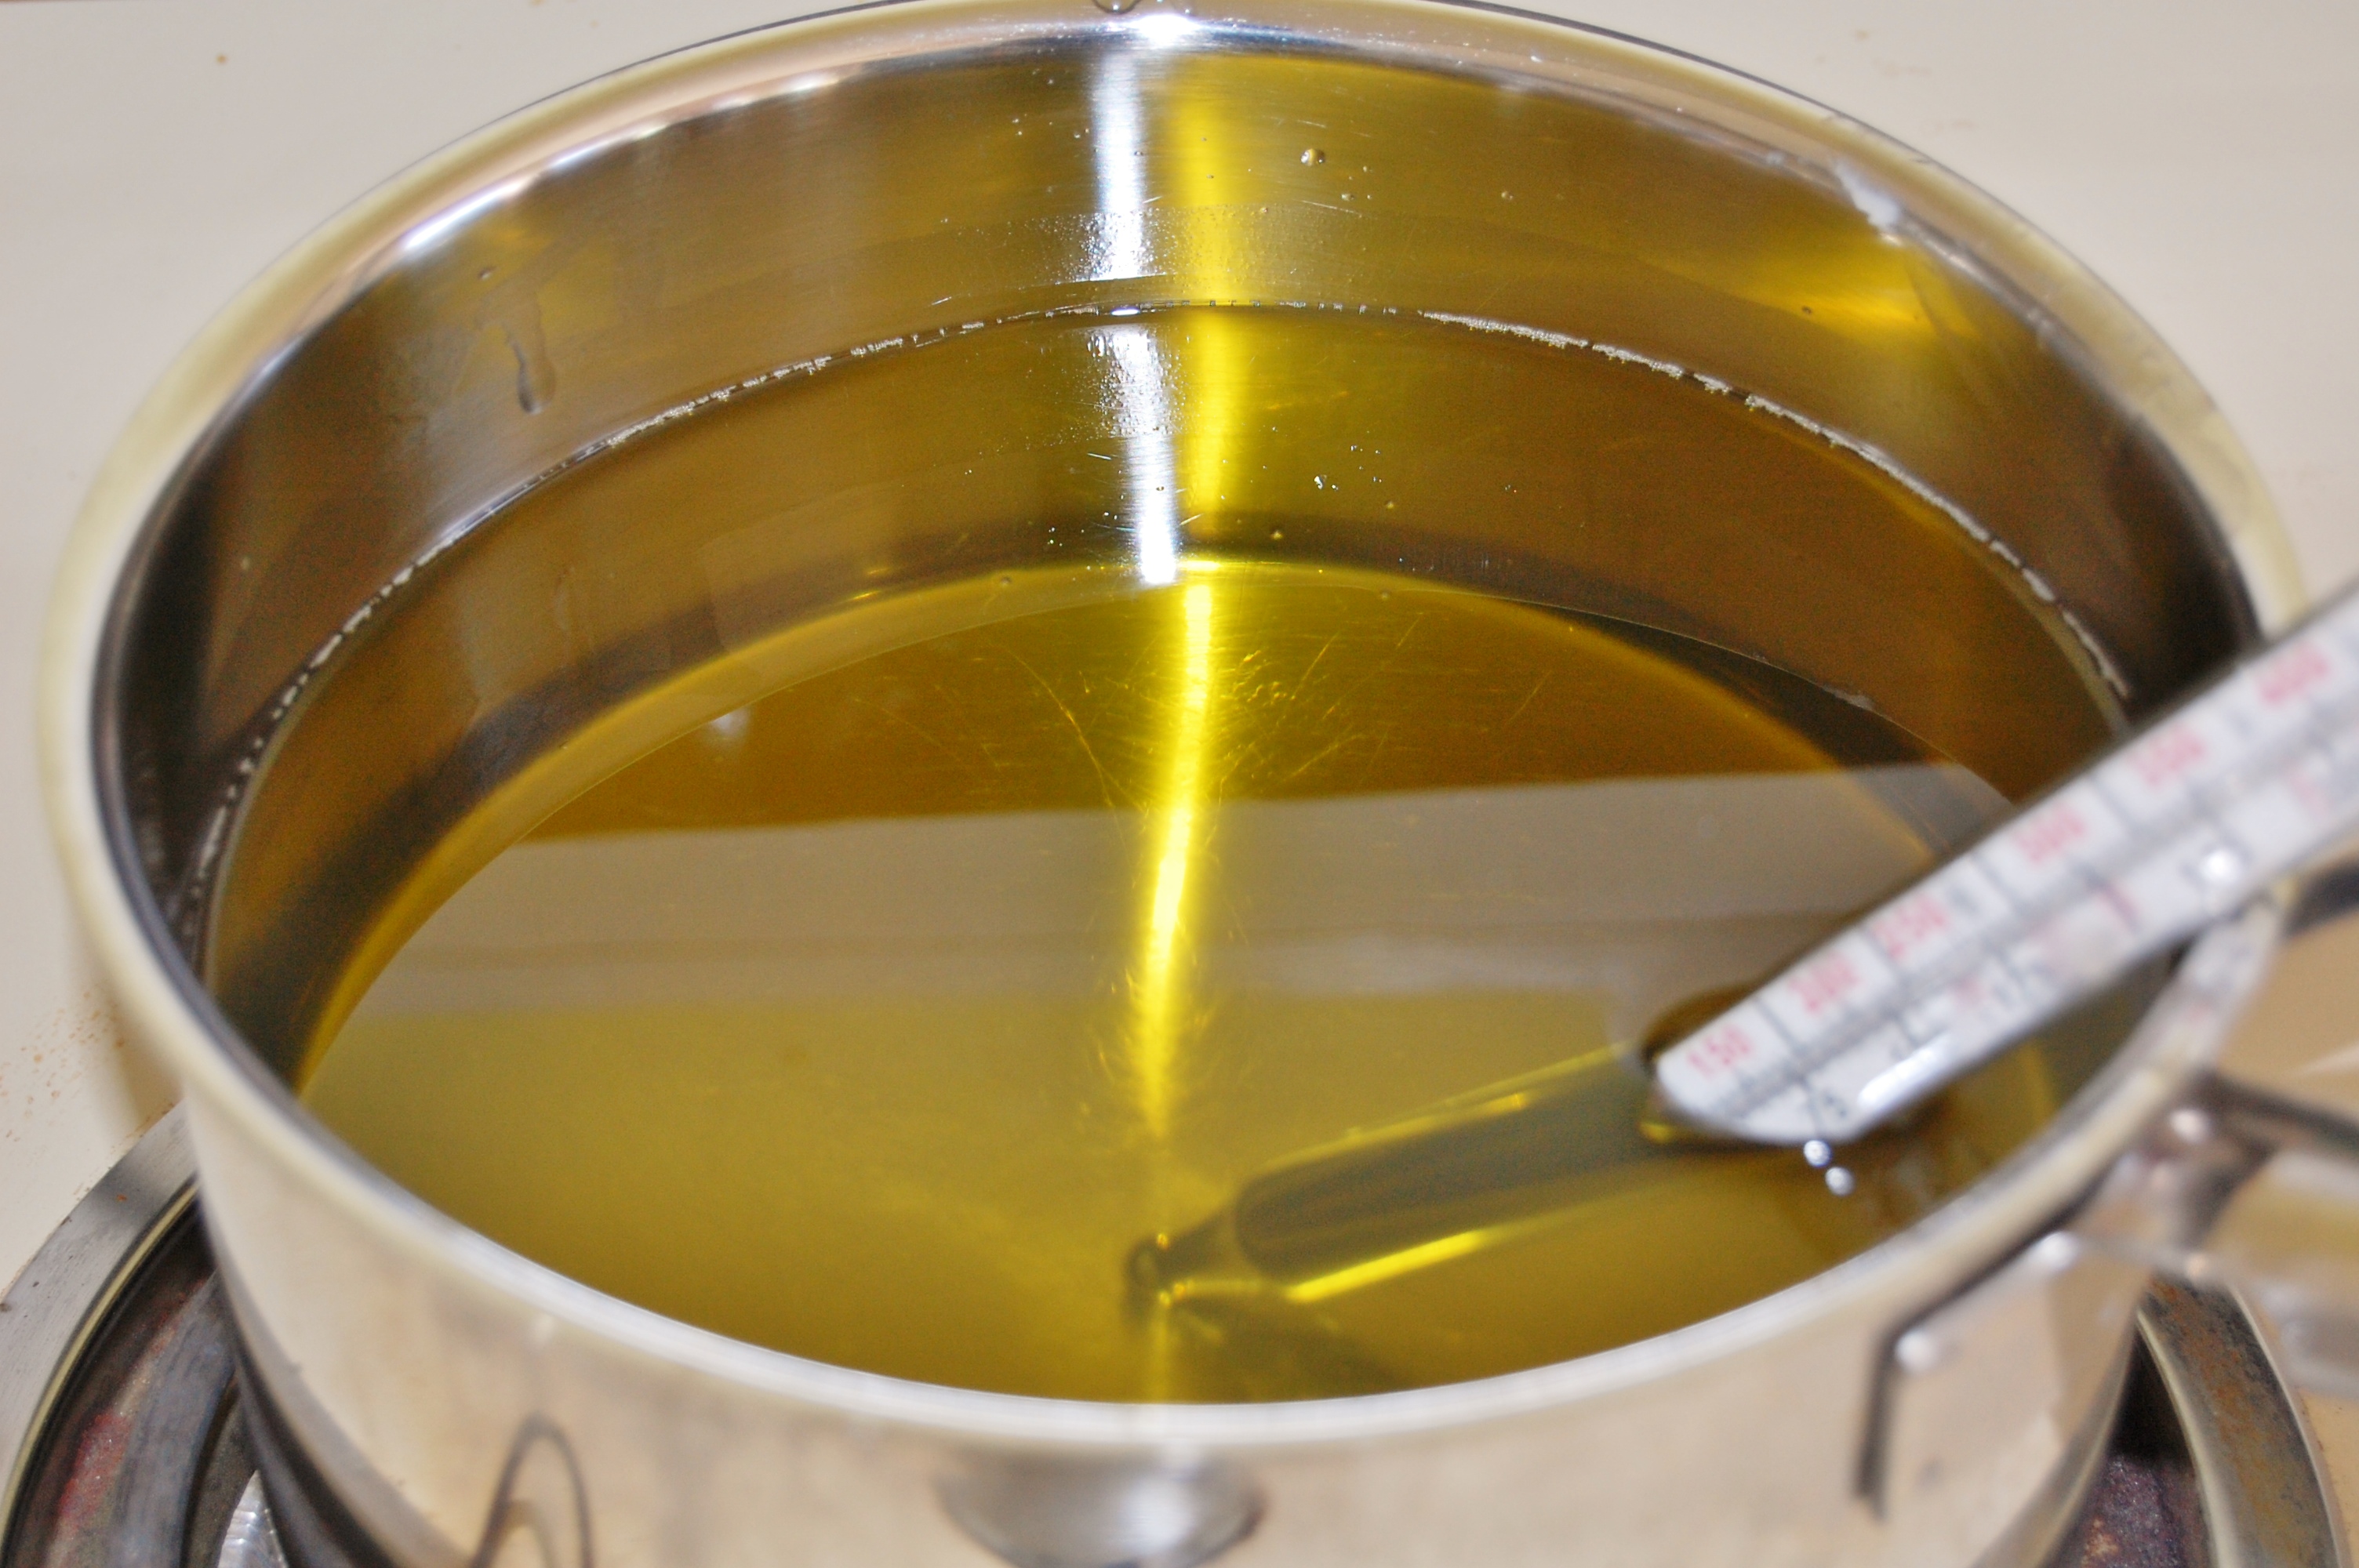
The first thing we do is combine all the oils (some of which are in solid form) and let them melt together. When making soap you really benefit from having a digital scale. All measurements must be weighed. In the same way that baking is more of an exact science than cooking, soap making is more of an exact science.
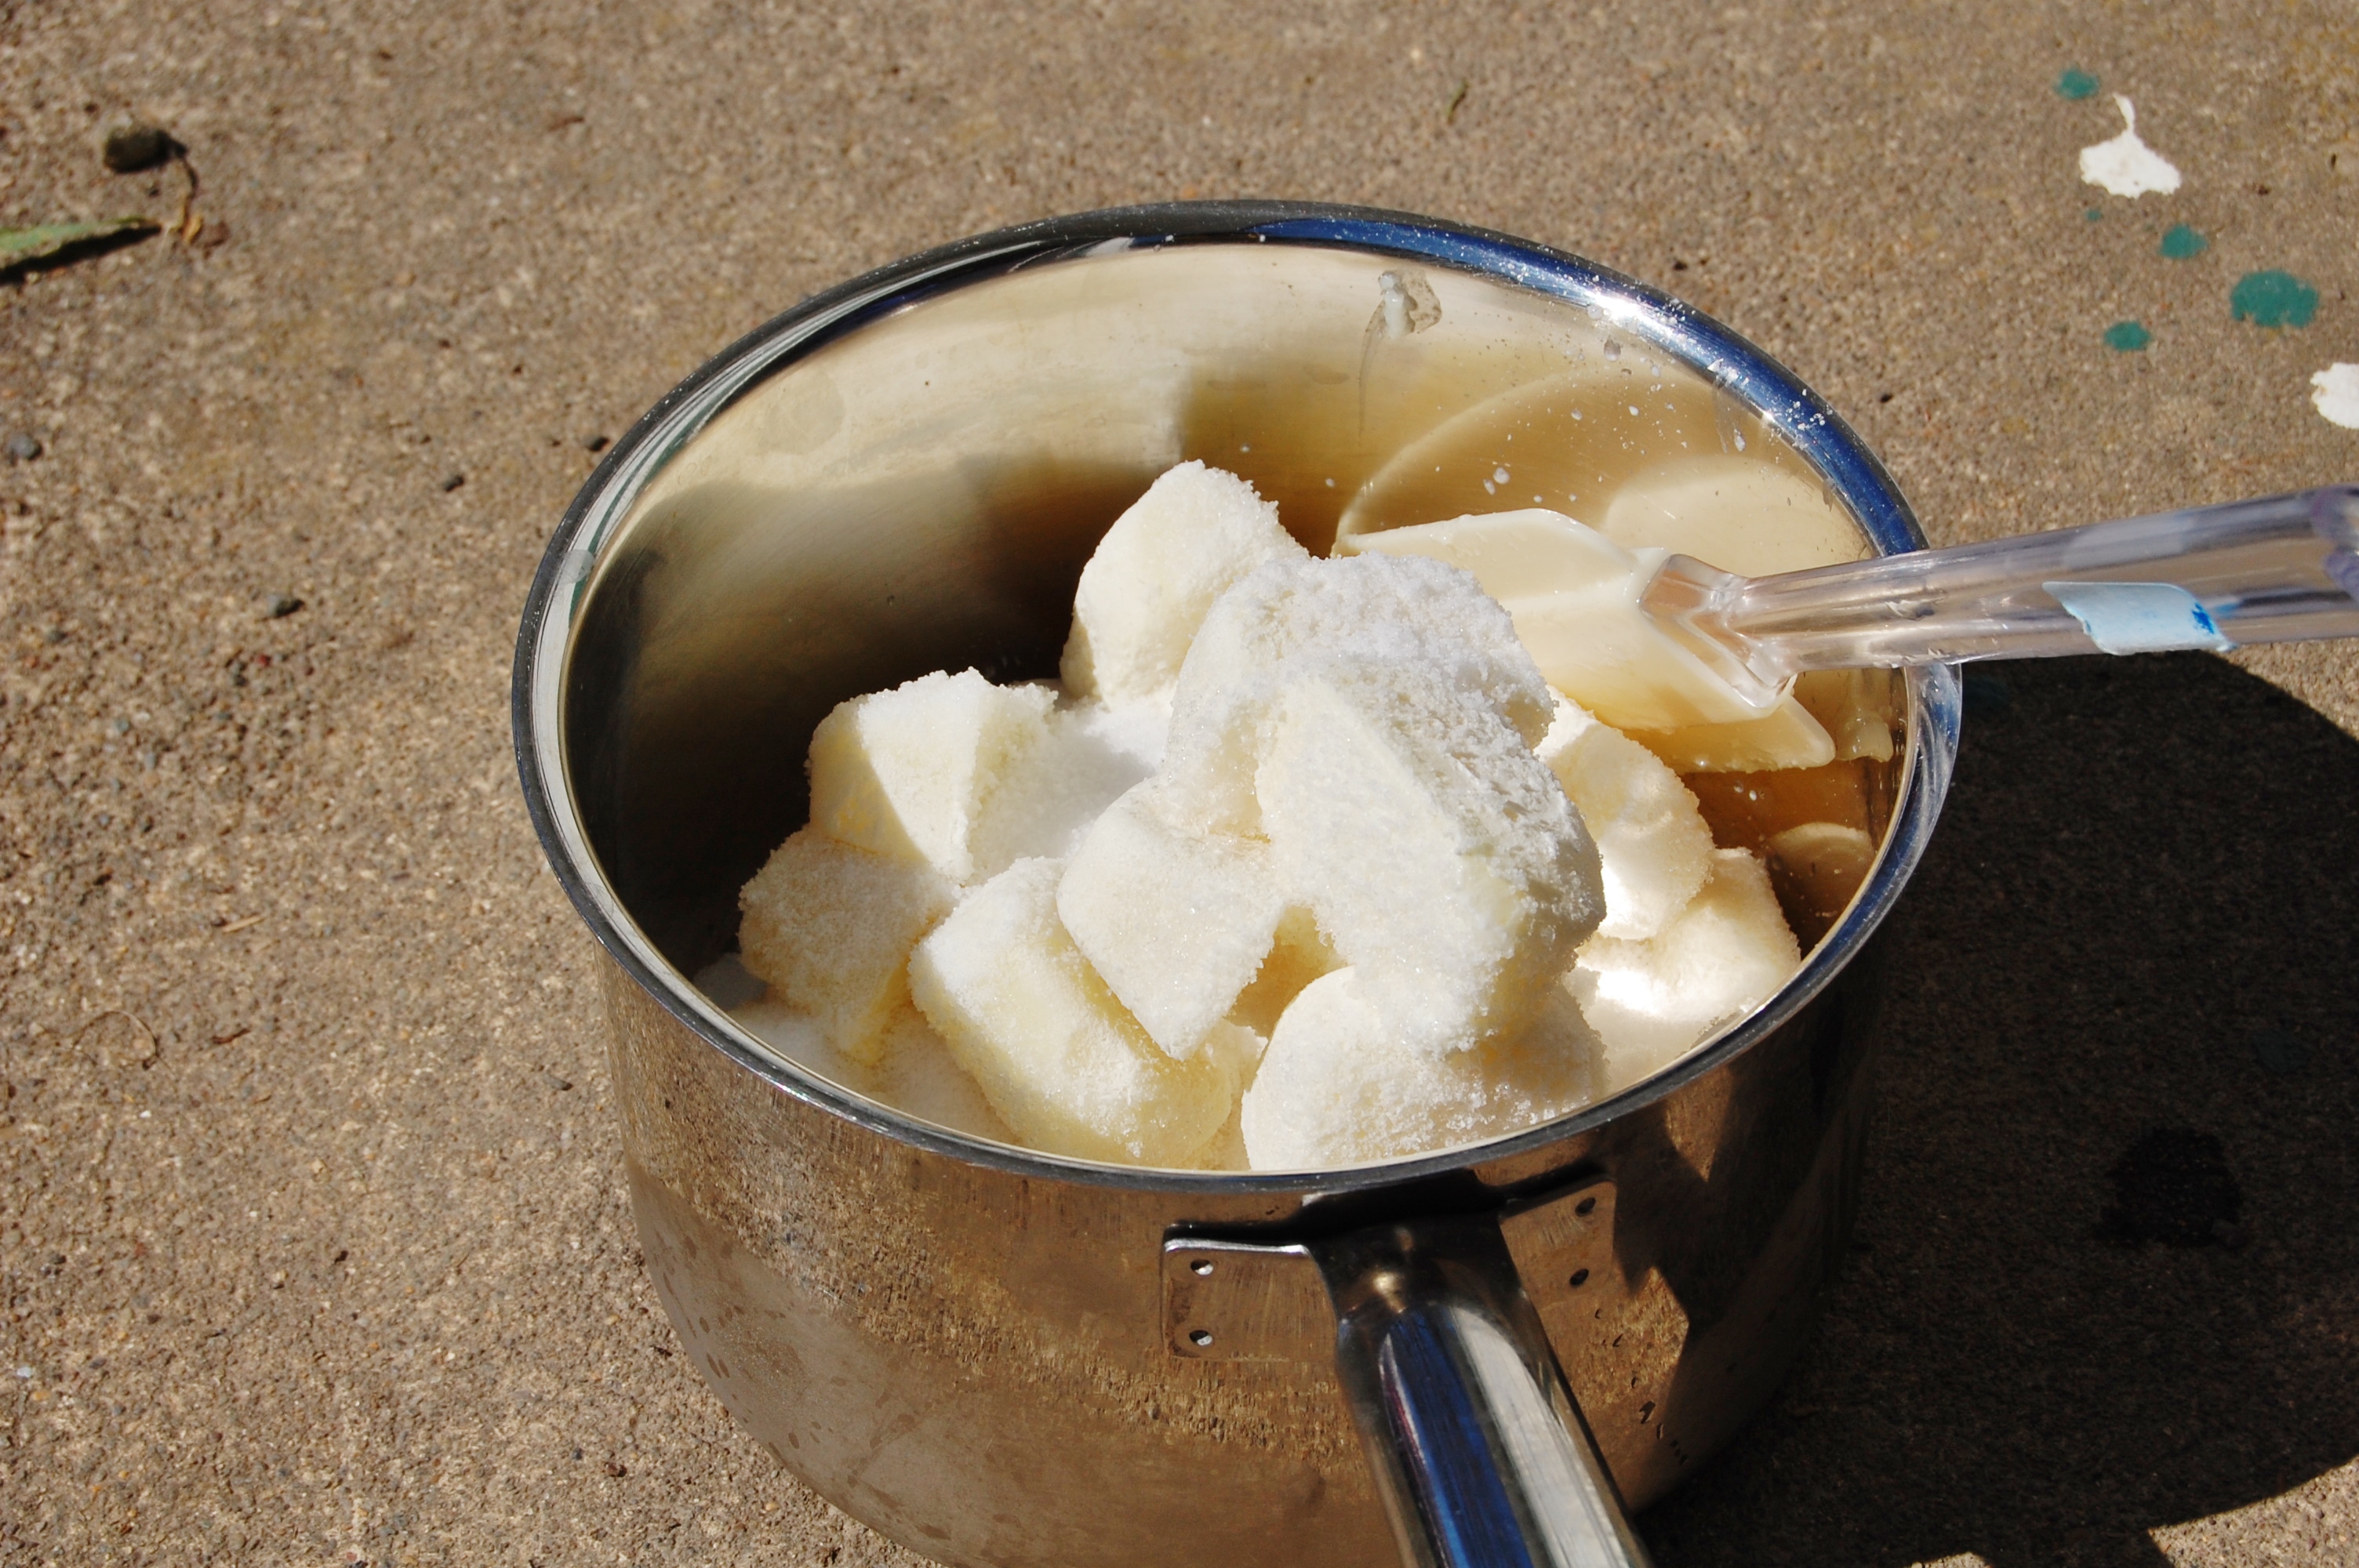
Once you get those melting you need to mix your goat milk with the Lye. When lye is mixed with a liquid it will get very hot. Heat and goat milk don’t work well together. To safely mix the two we freeze our goat milk first. I use ice cube trays. I weigh the amount of goat milk ice cubes that I need into a non-reactive container. Then into another container I weigh out my lye. When I have the proper amount of each of those I sprinkle the lye over the milk ice cubes. Stirring regularly until the lye melts the cubes. When it is done it is quite cool.
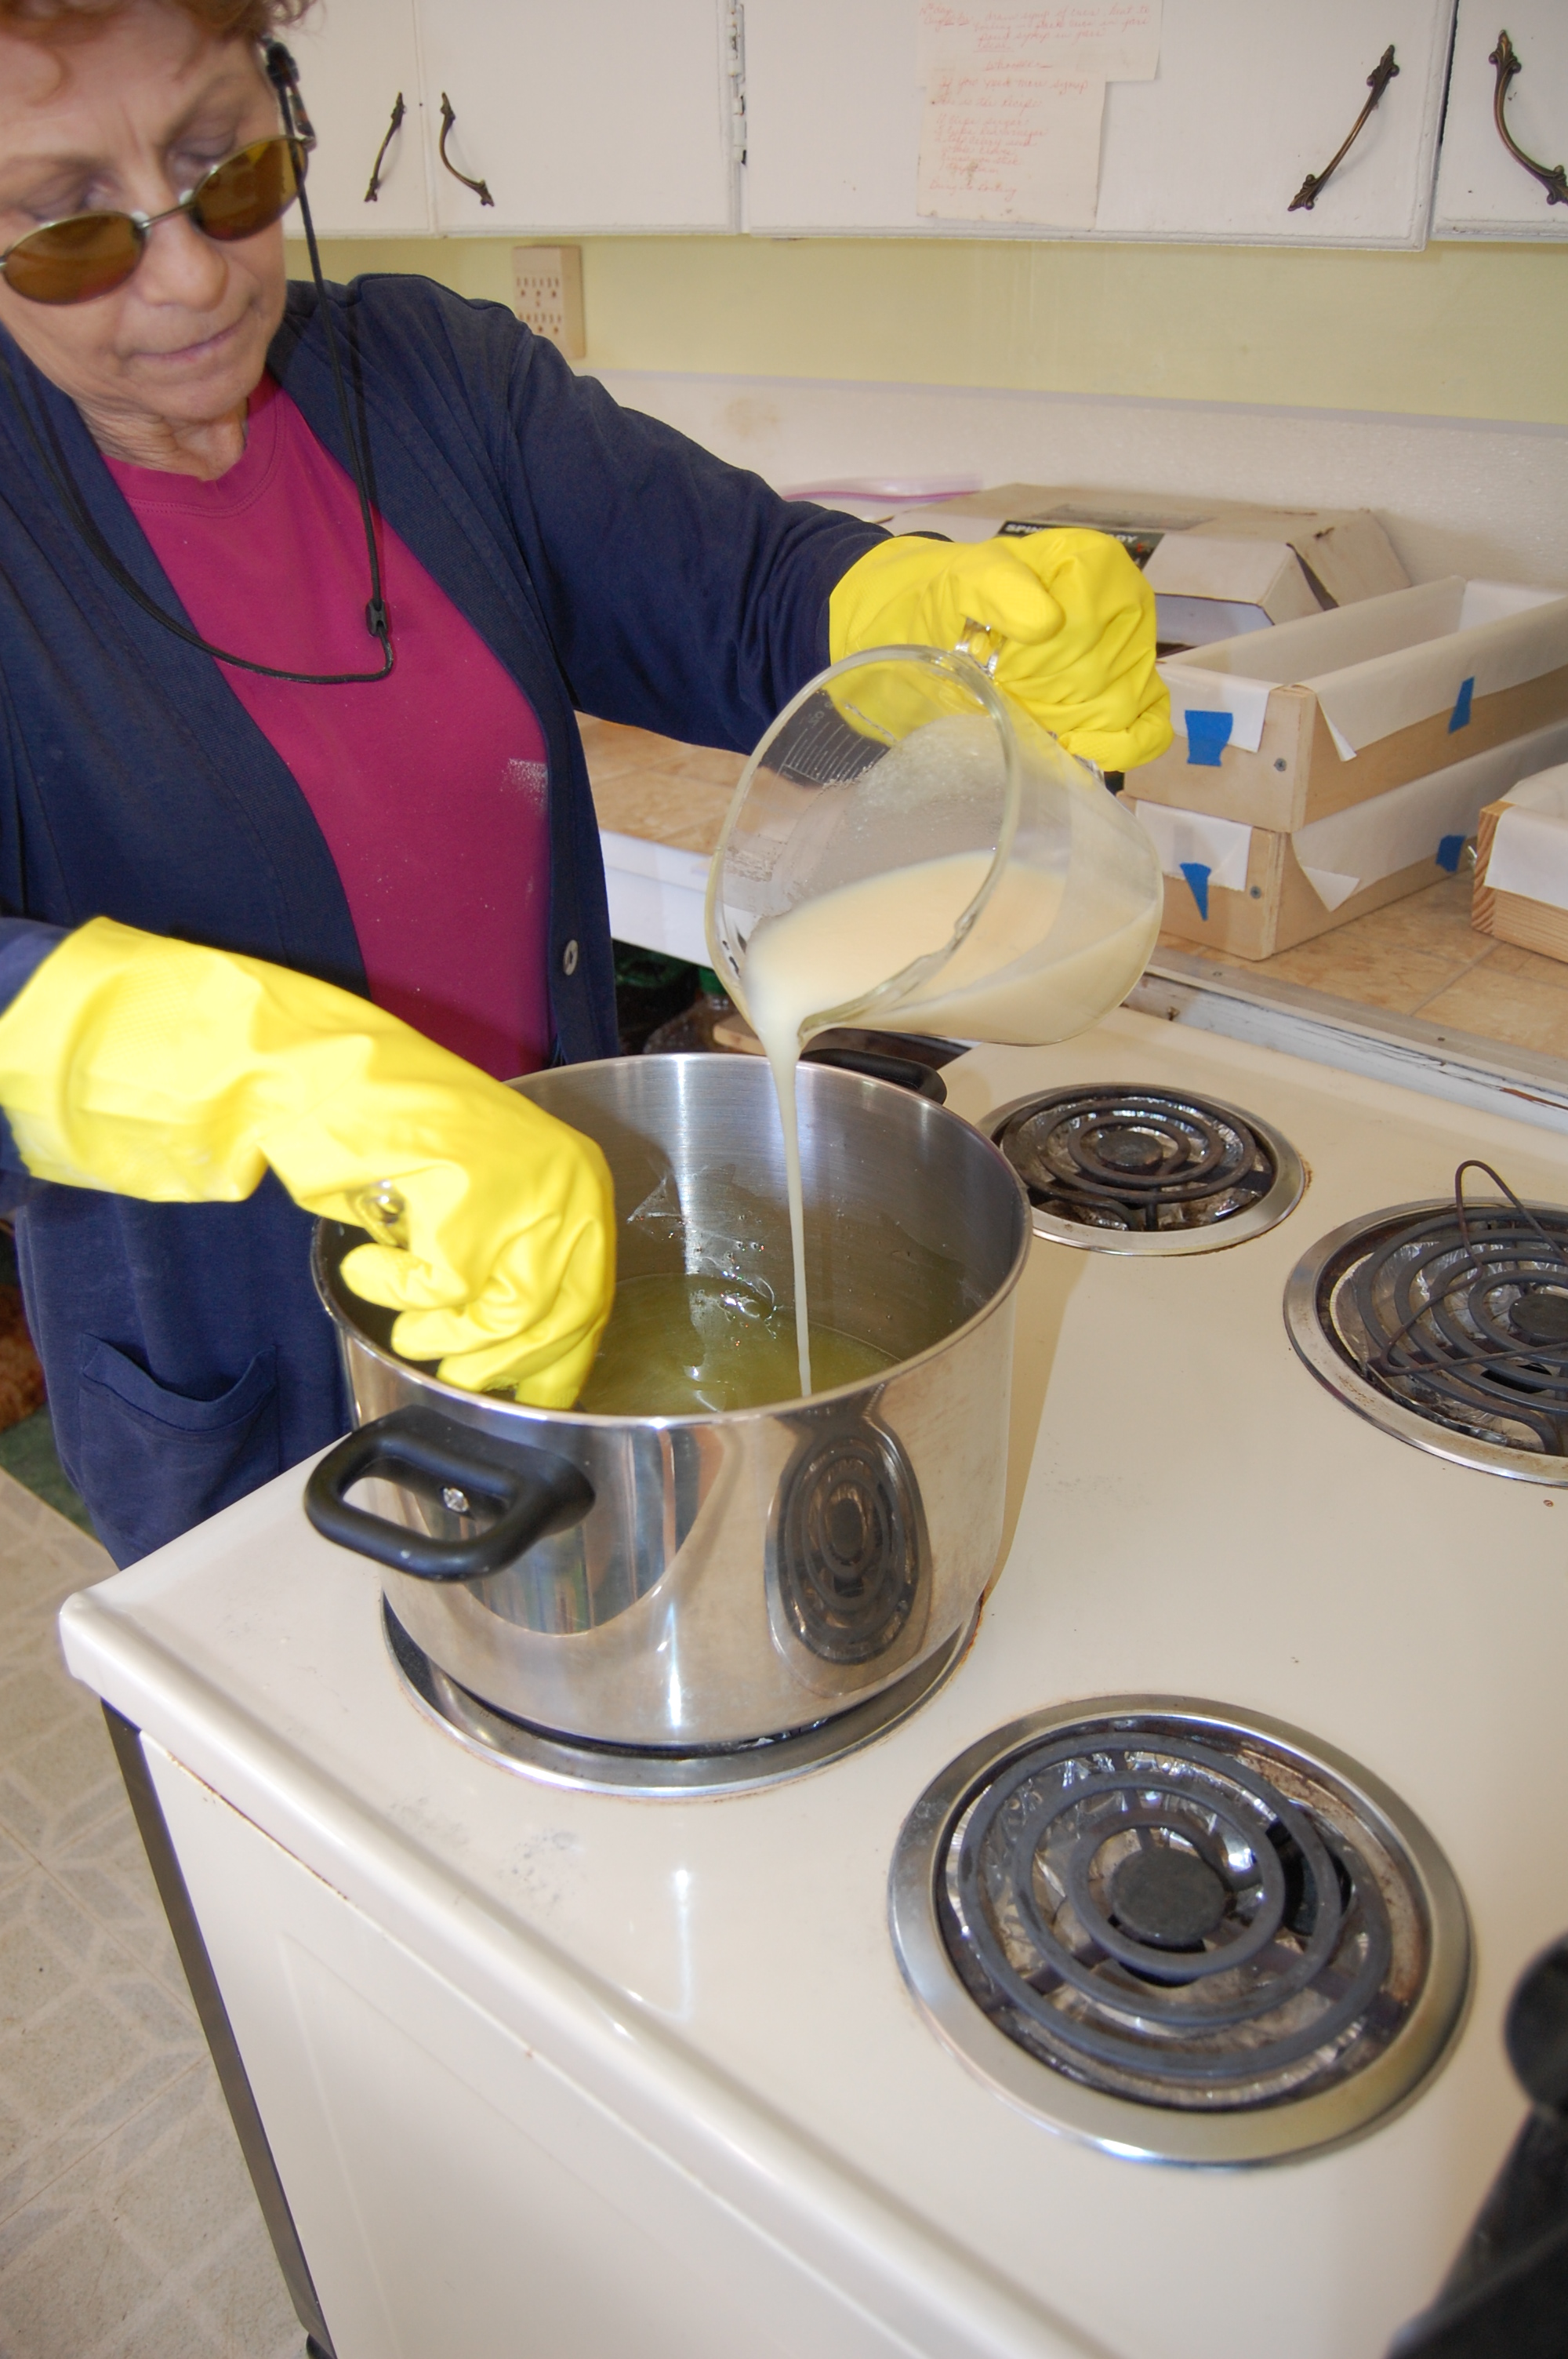
Once both the oils and the lye/milk mixture are done you need to mix them. If we were not using milk but using water instead you would want both mixtures at 100 degrees. Because we are using milk we want both at room temperature. When you mix the oils and the lye/milk you always pour the lye mixture into the oil mixture. Because lye is corrosive, we wear gloves and glasses to protect ourselves. If you did get some of the lye on your skin vinegar is your best friend. Somehow it neutralizes the corrosive and caustic nature of lye. Keep it near.
Once the two mixtures are combined you need to mix it until saponification. Big word that means all the ingredients have combined to make soap. The mixture will get thick and when you lift the immersion blender out and let it dribble the line will stay on top for a bit before sinking, we call it tracing.
For one batch I added a little ground oatmeal and just a bit of orange essential oil. Then mixed to combine.
At this point it is done. You will need to pour it into a mold quickly. In the past I have used boxes lined with parchment paper. You can really use anything as long as you like the shape and you can remove the soap after it has firmed up. A quart milk carton would make cute little bars. This summer I treated myself to an official five pound soap mold. It was $50 so I only bought one. The weekend before Michael and the boys left for camping Michael made me two extras in about a half hour. He is so talented. My homemade ones didn’t have the hardware that the purchased one has but they work great. I lined each of them with freezer paper.
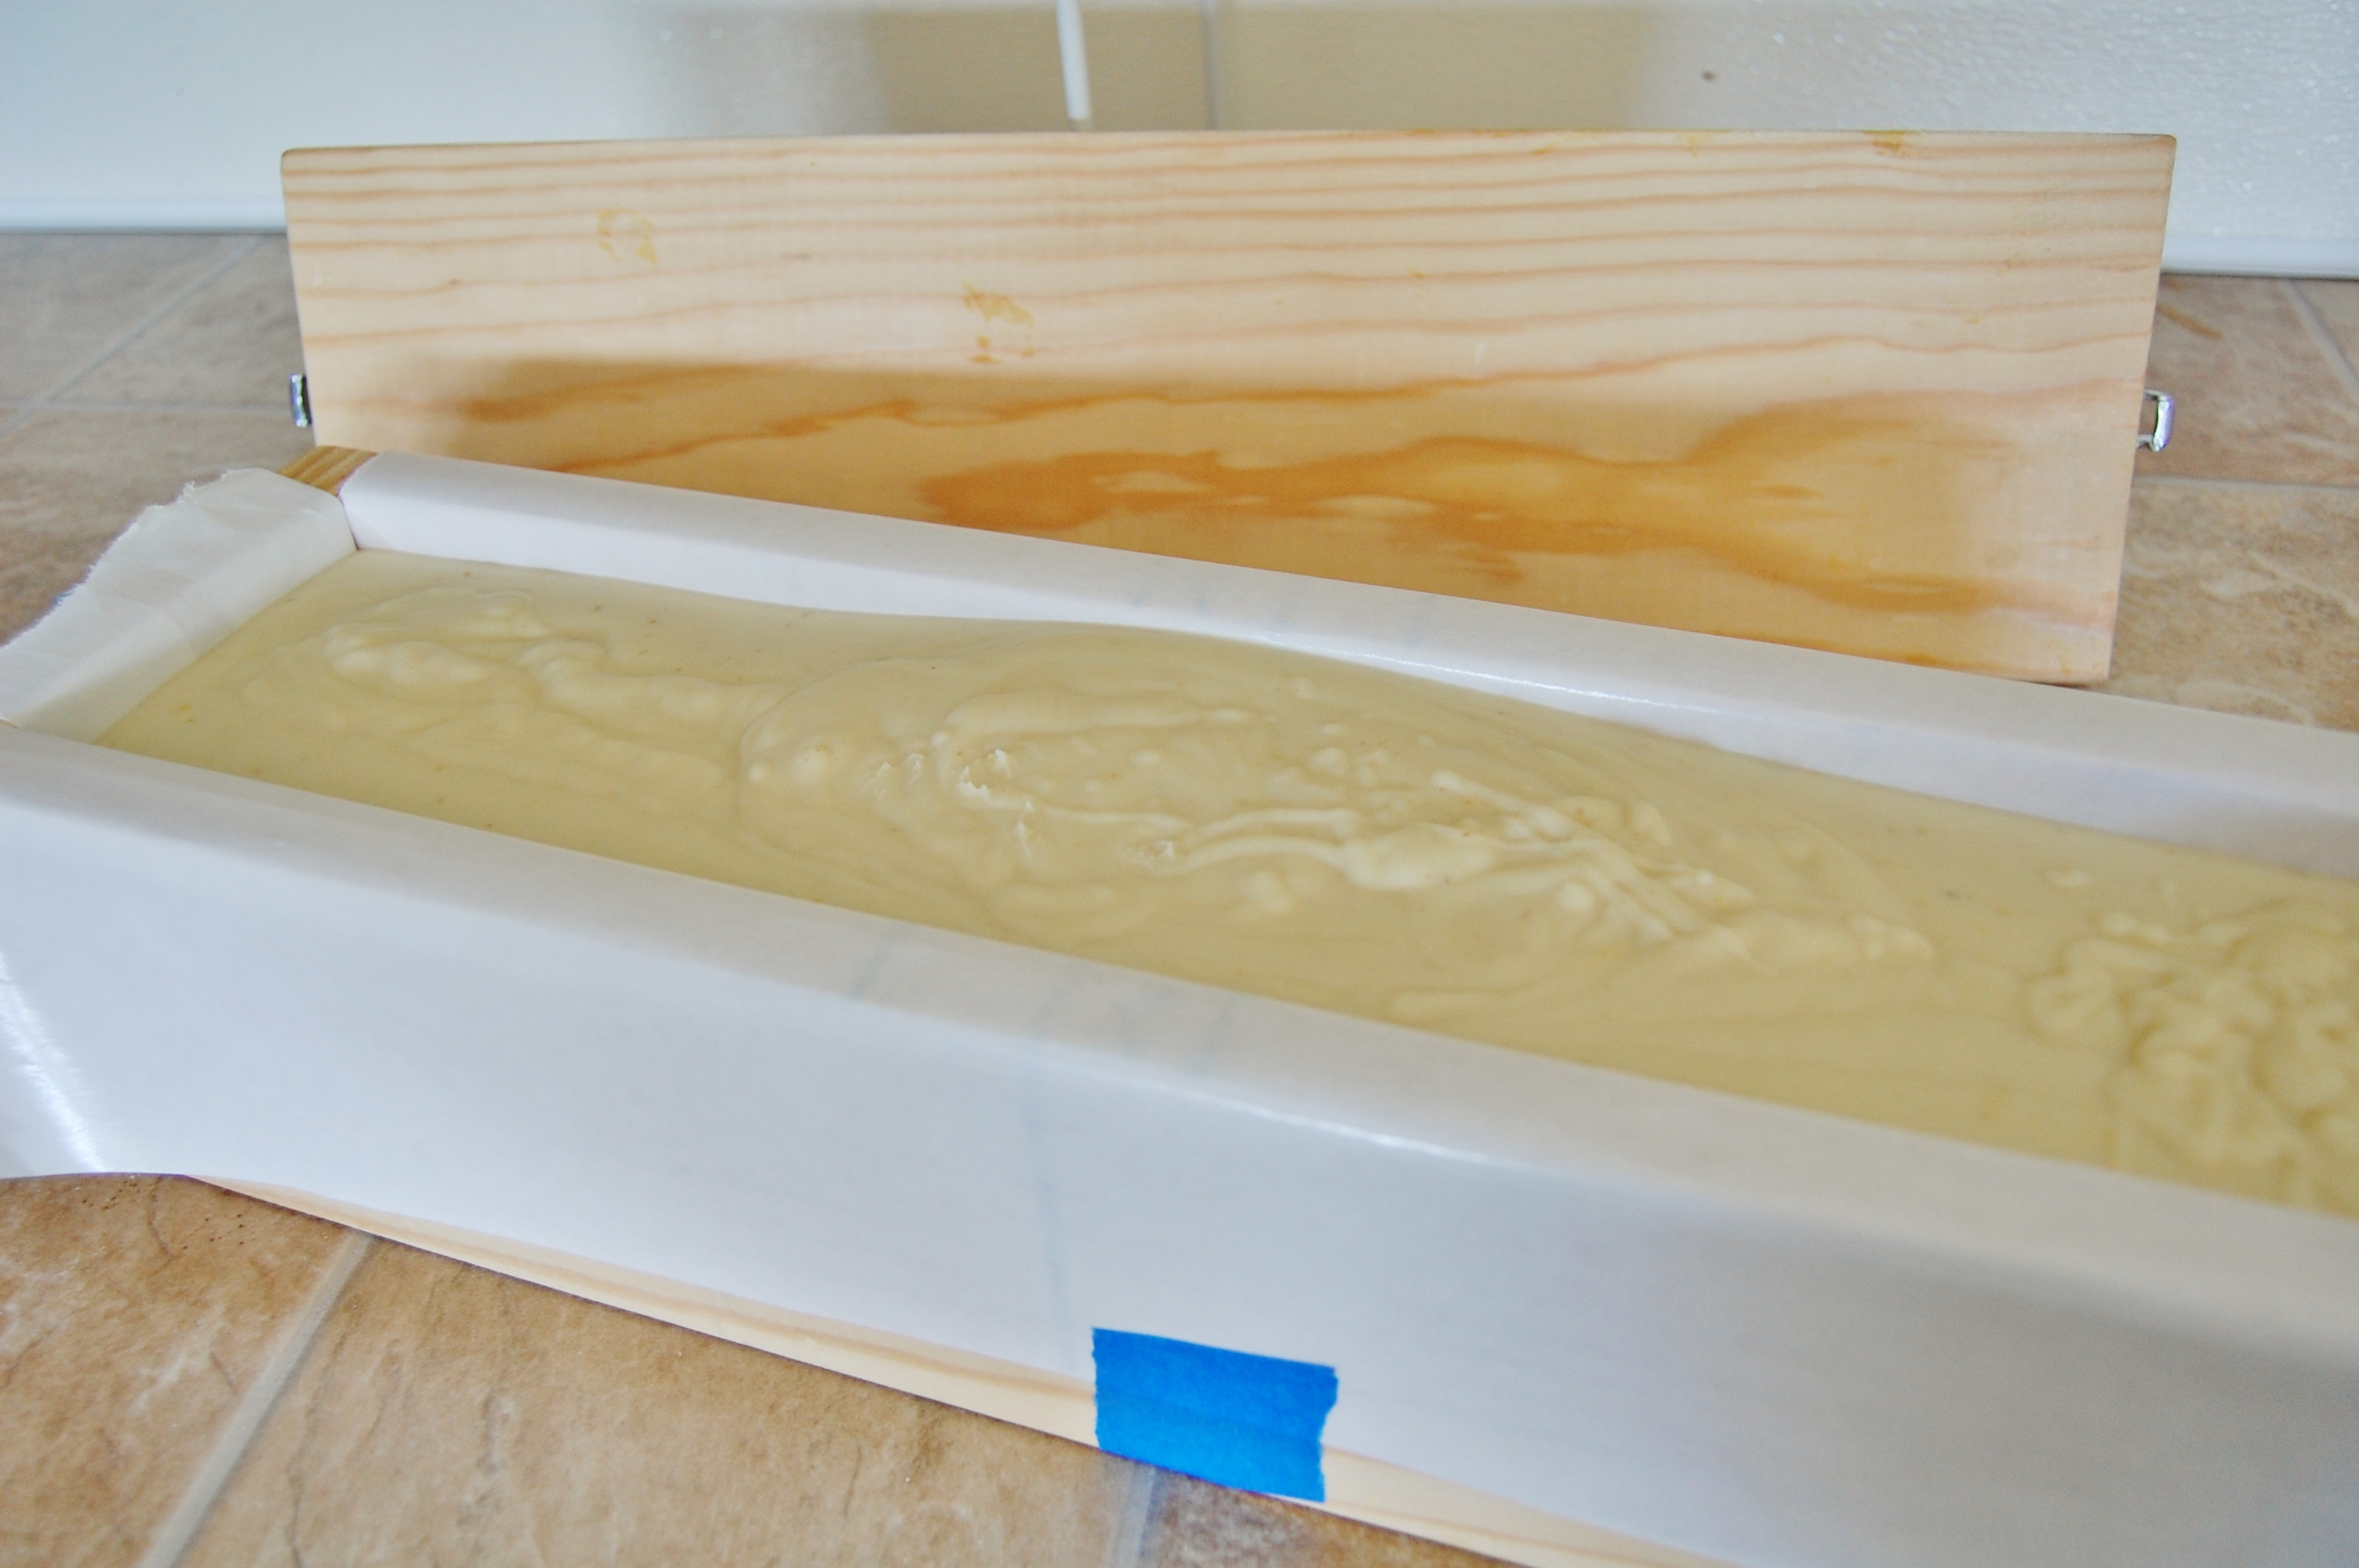
I put the lid on top and set it off to the side. Nancy and I made two other batches. It went much faster after that first batch.
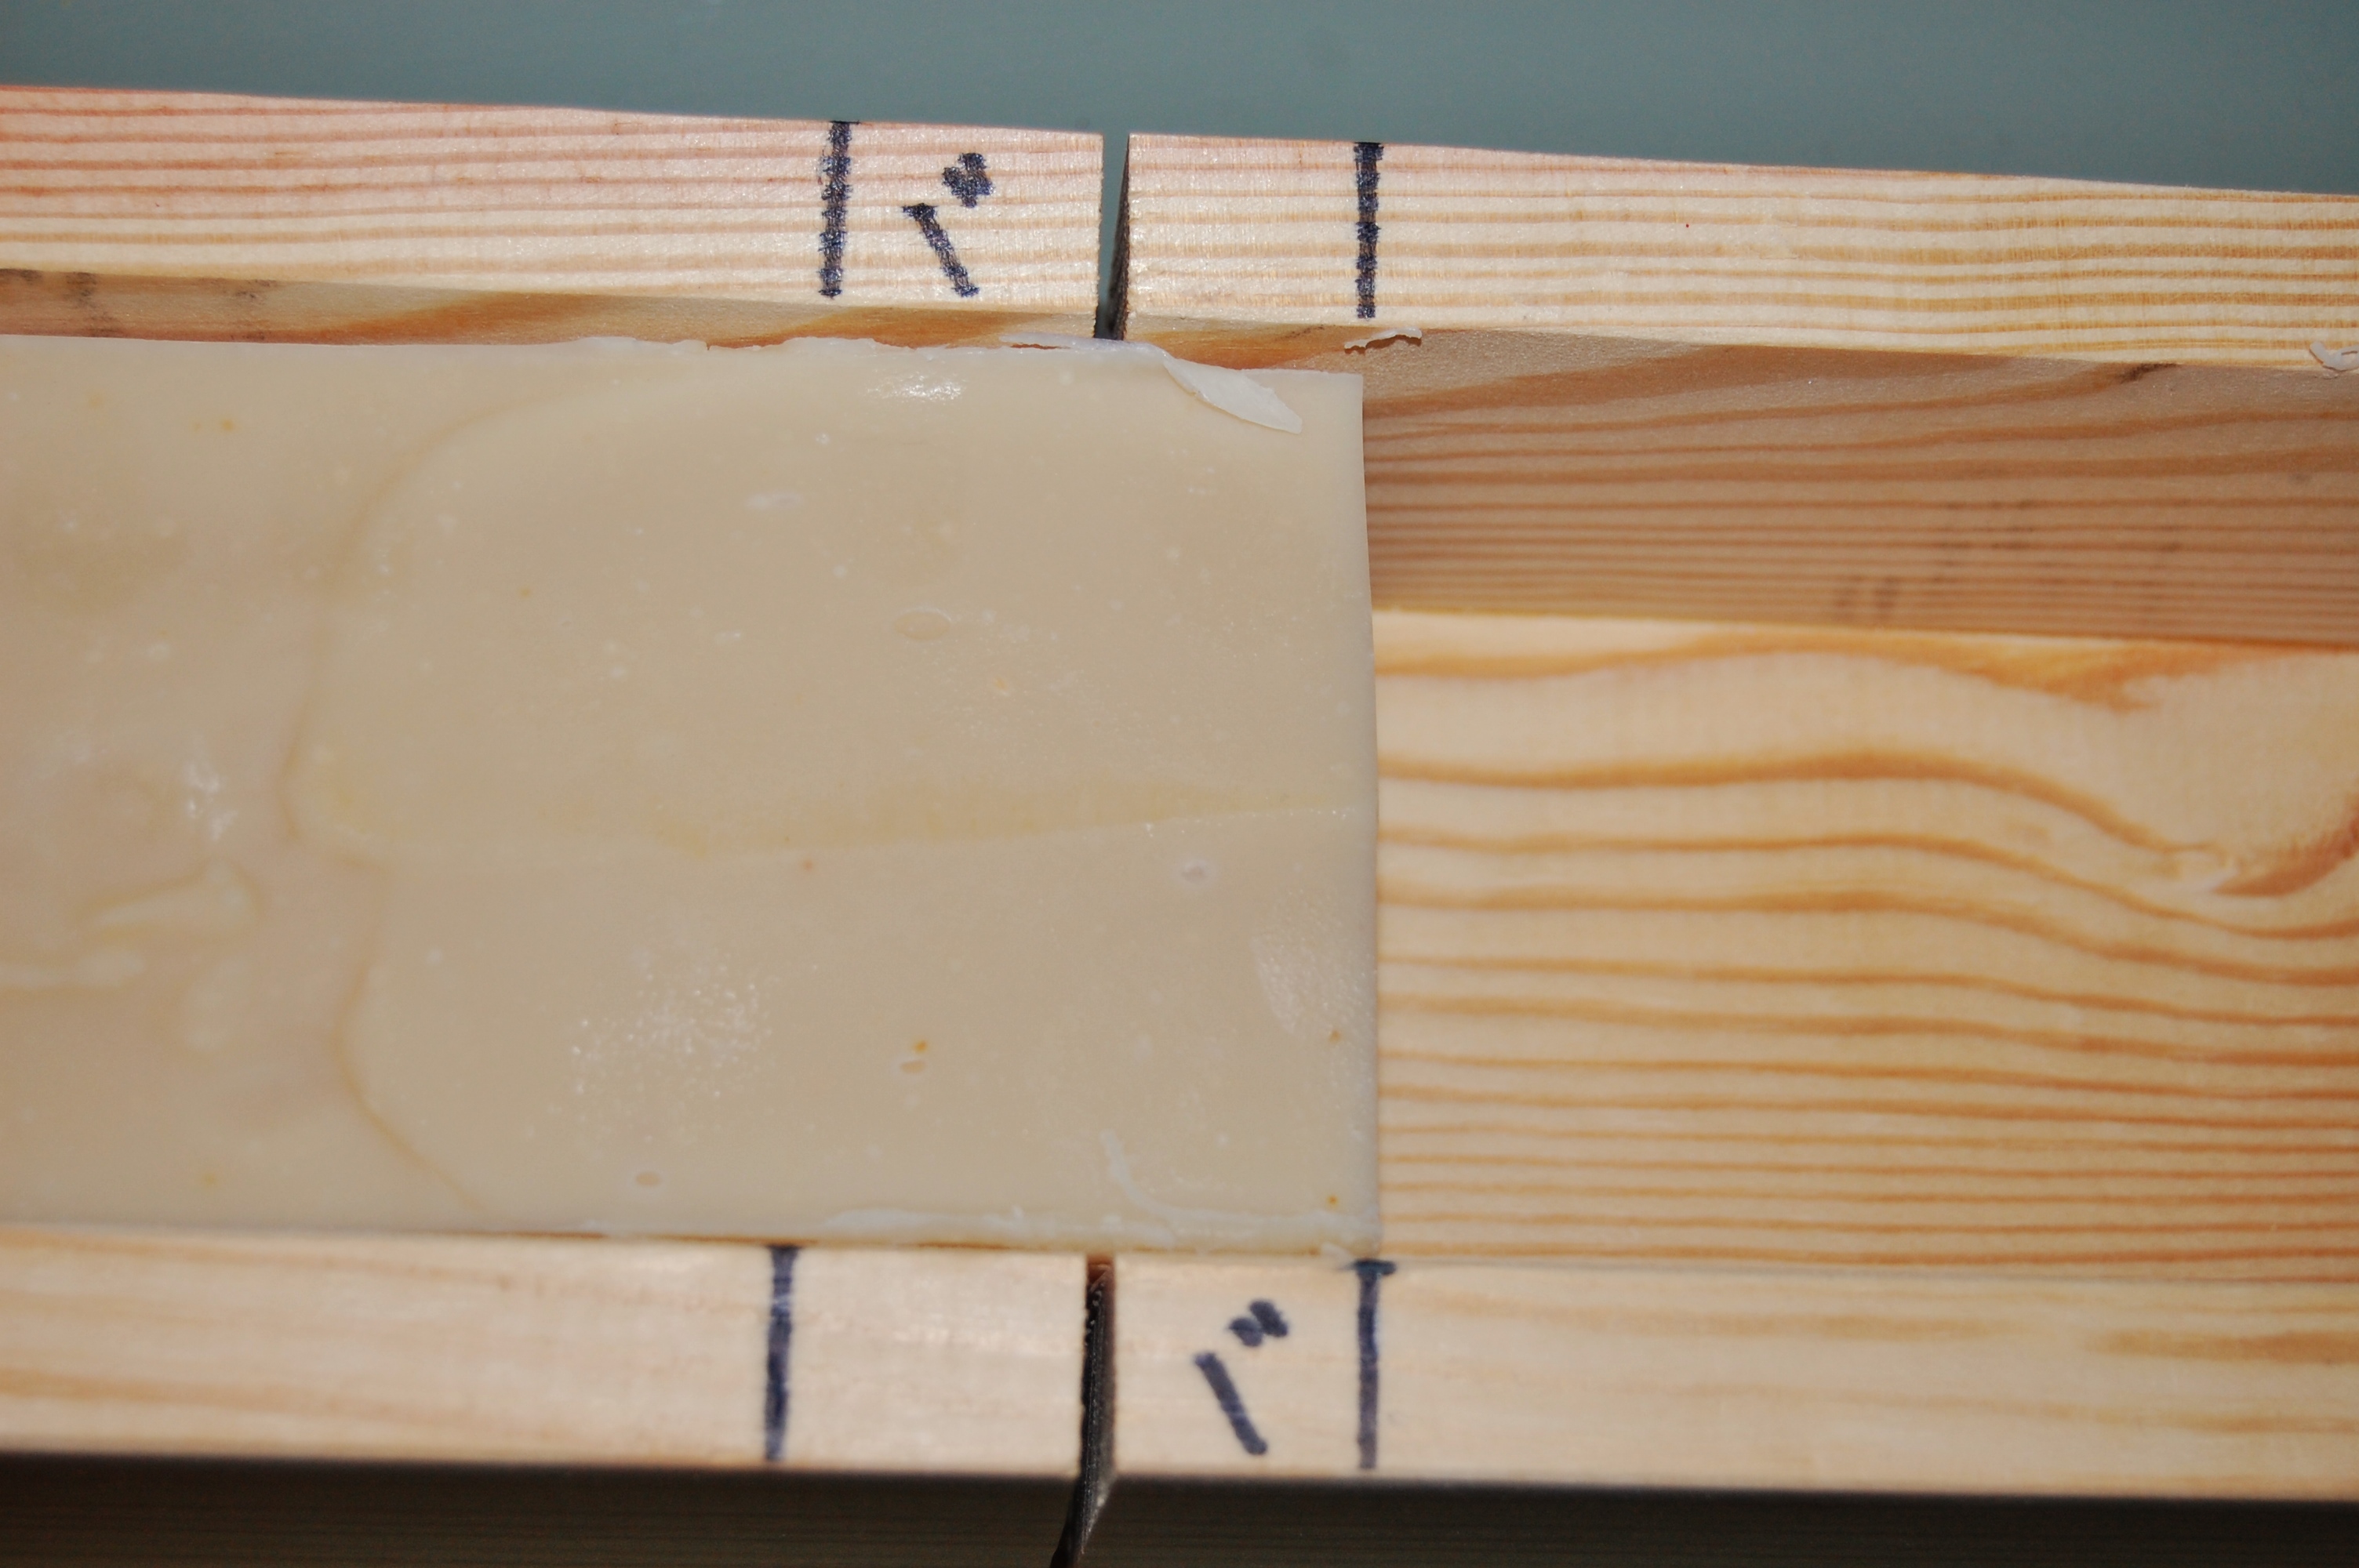
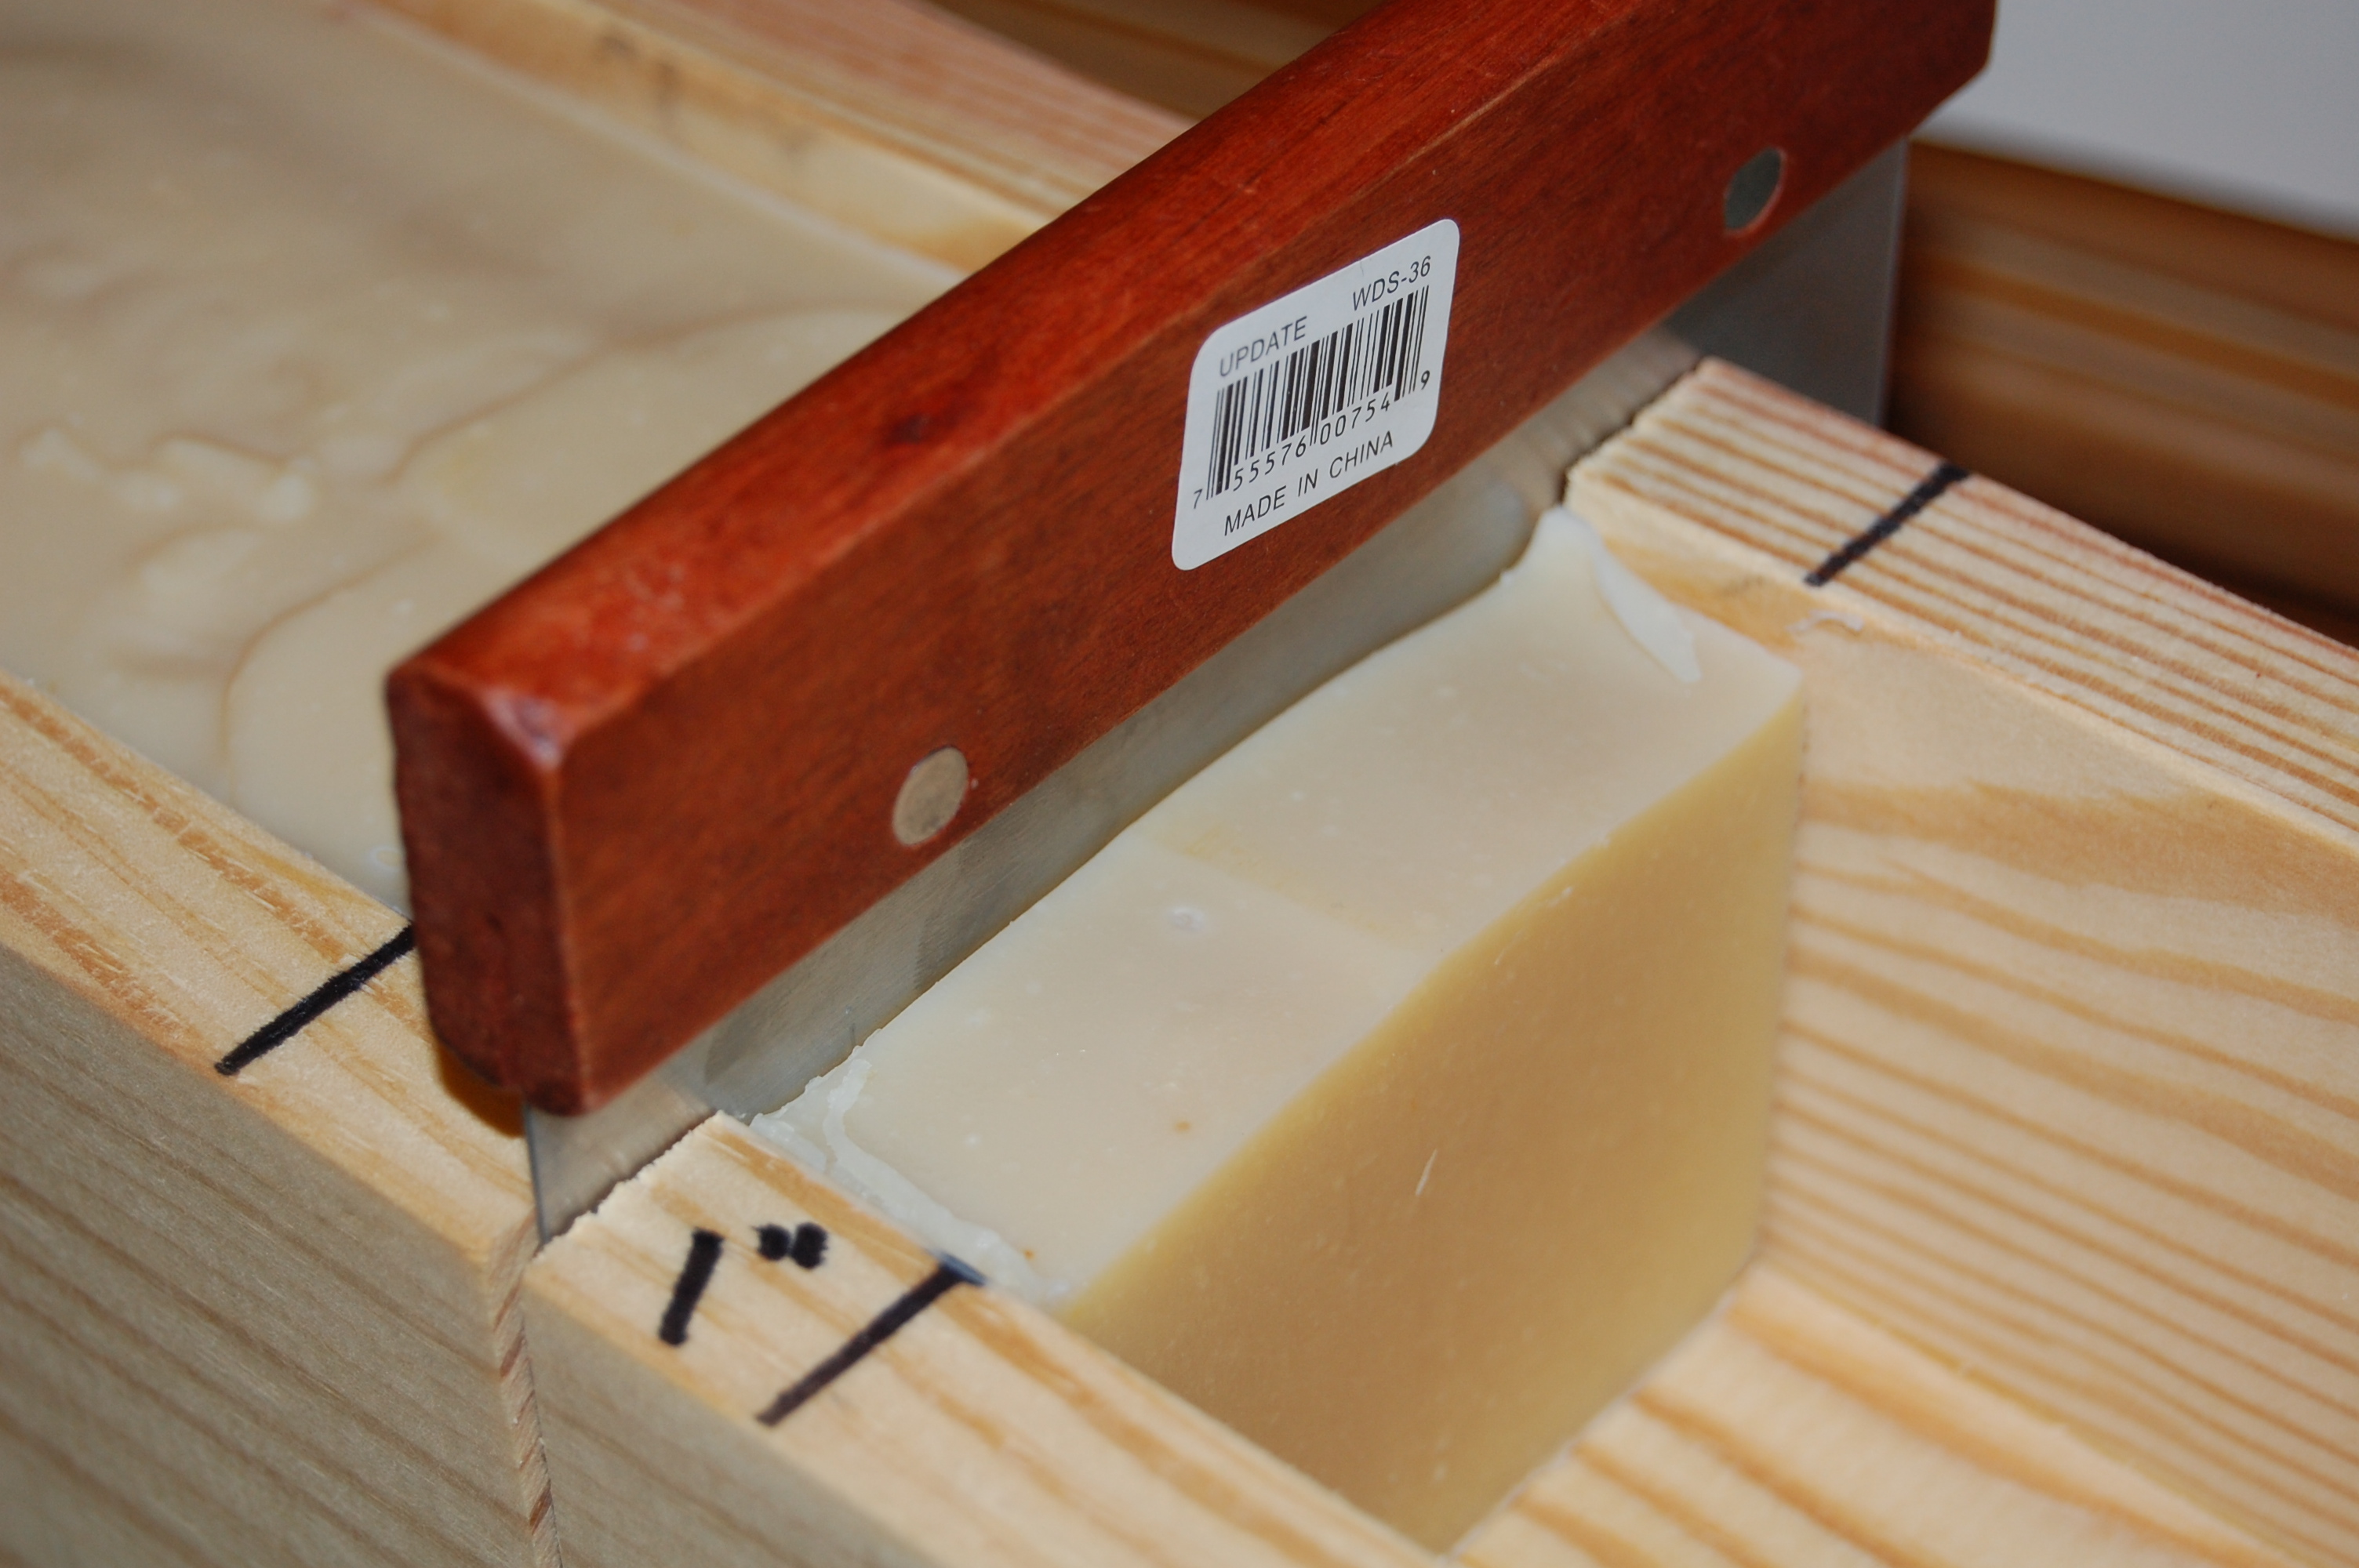
Once the soap hardened I pulled it out of the mold and cut it. The purchased mold has a cutting slot and one inch marks.
Using a bench scraper I cut one bar at a time.
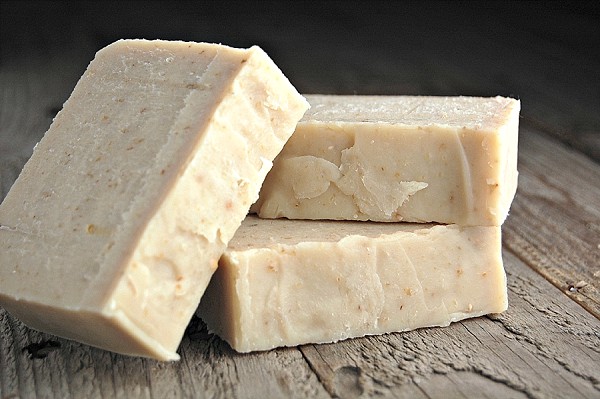
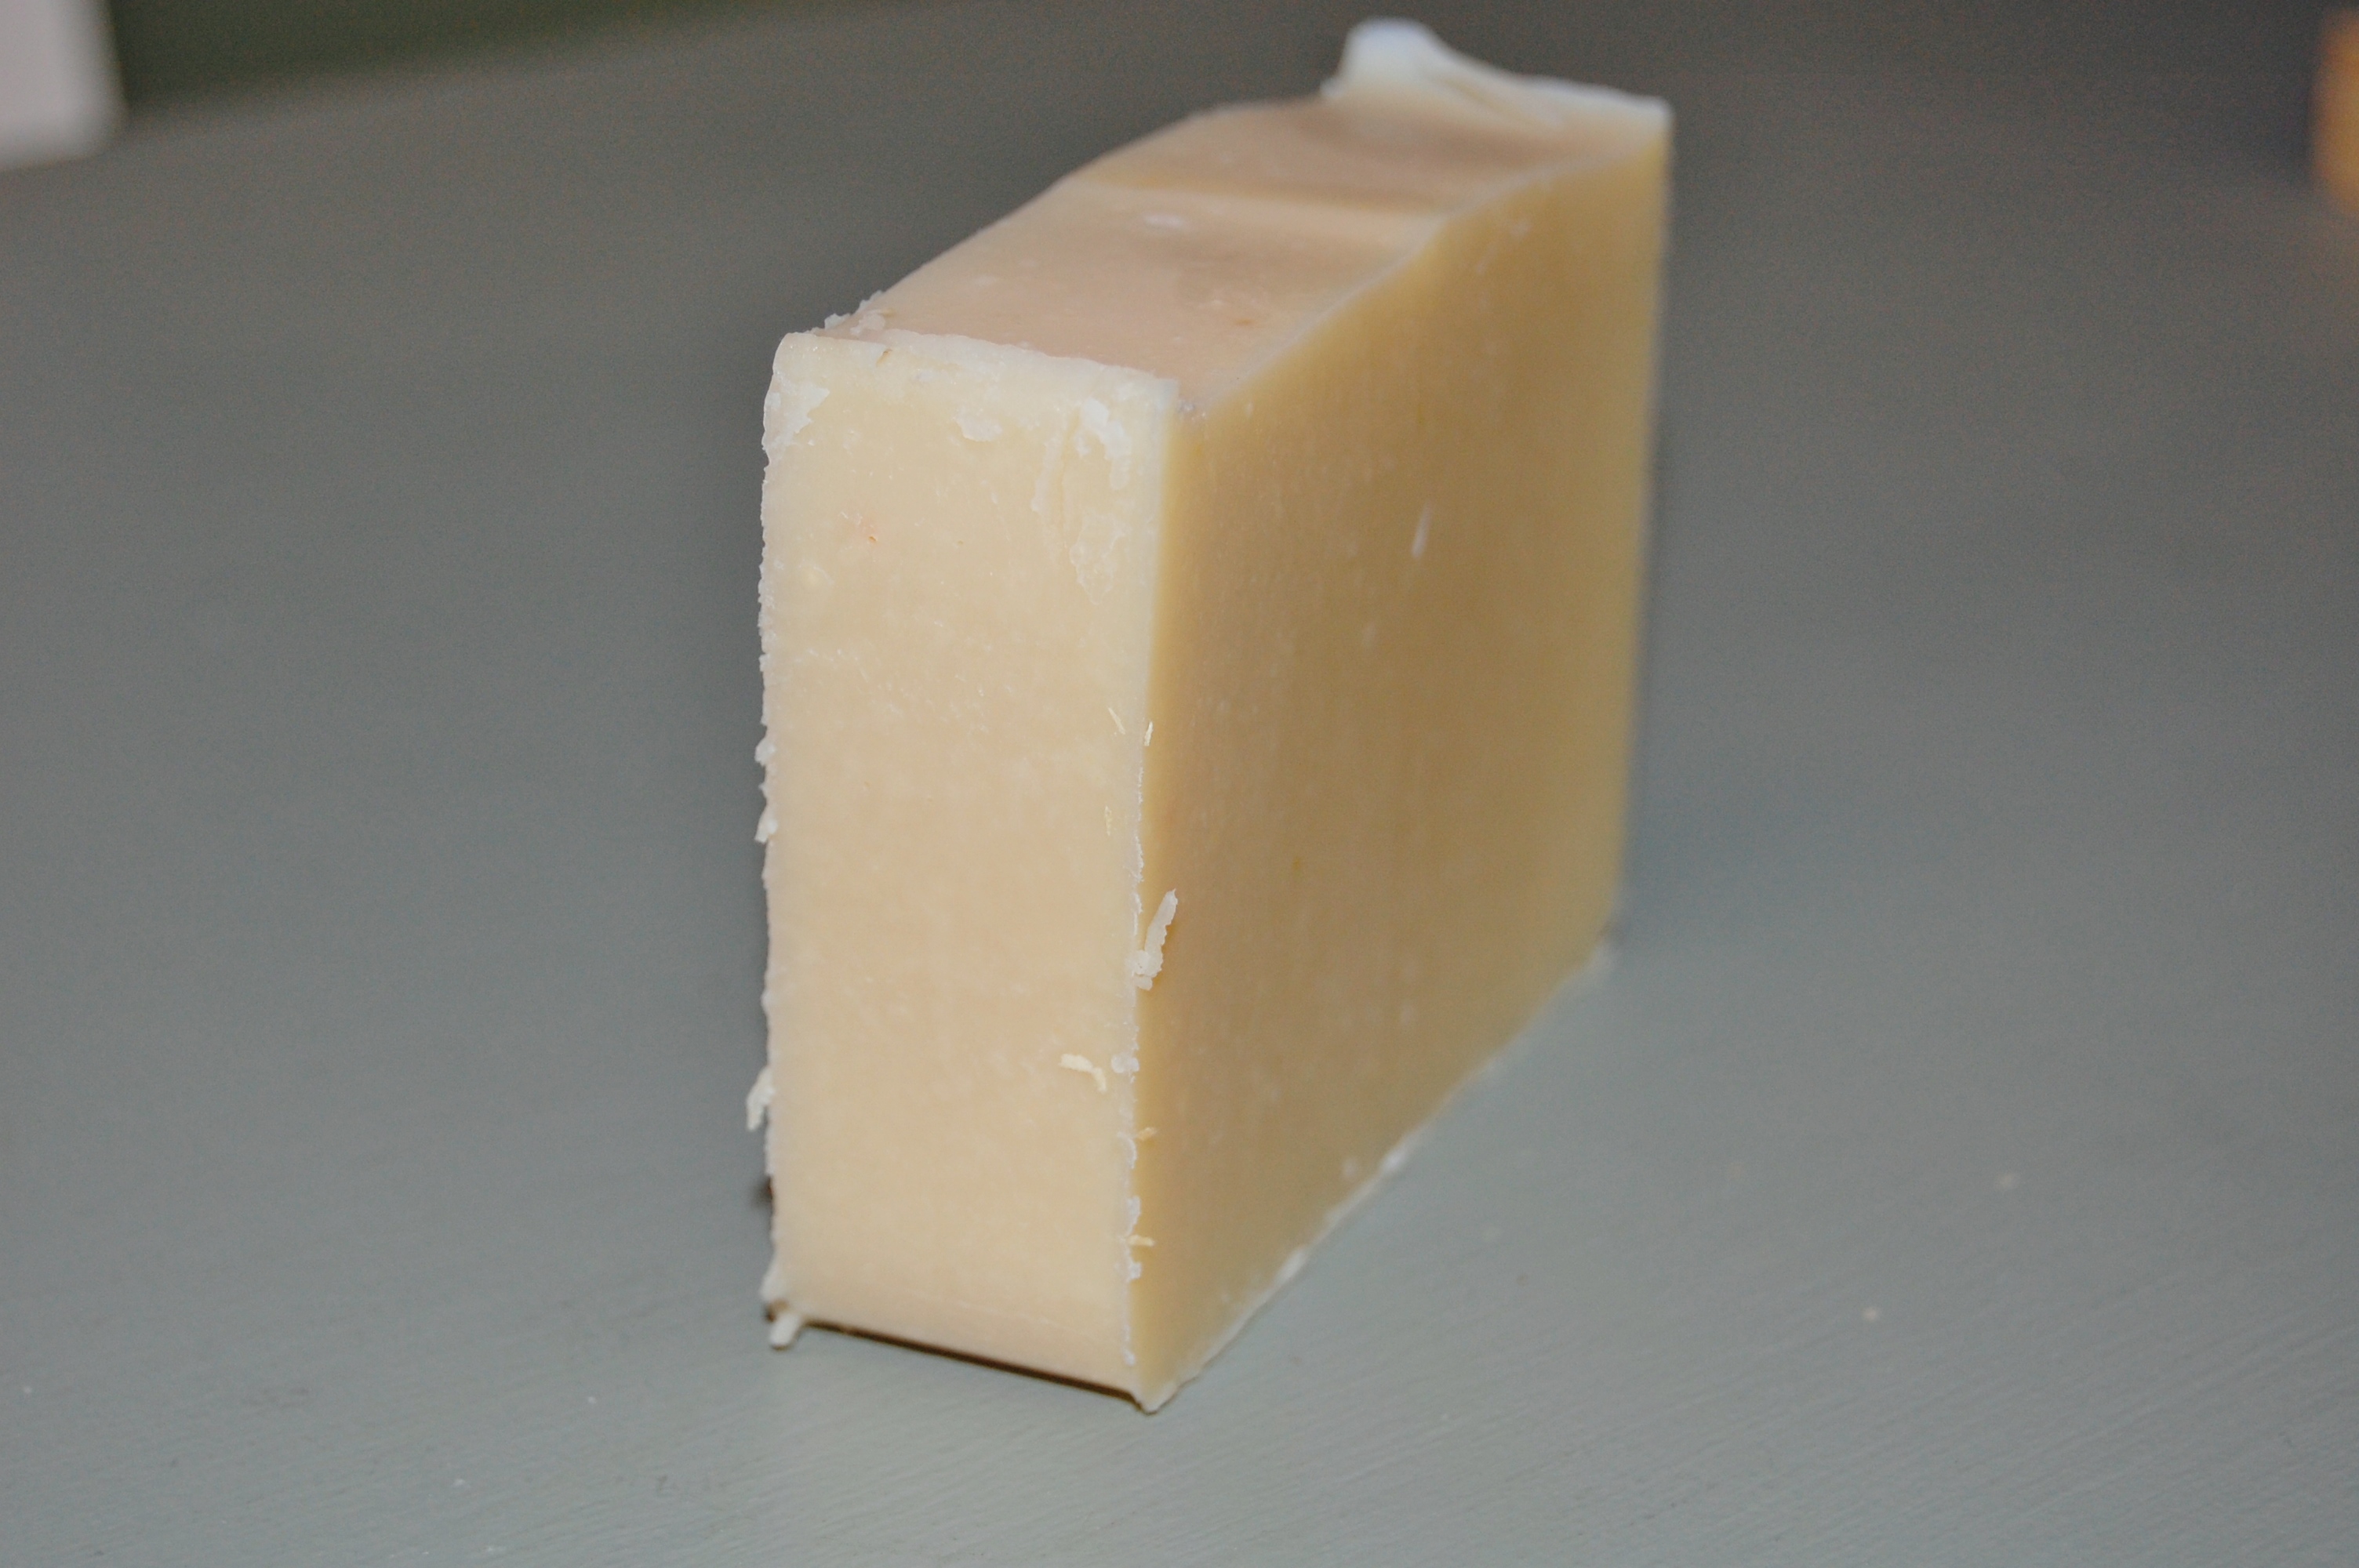
Here is a finished bar of soap. Ok, so it isn’t finished. It has to sit for six to eight weeks before it is good to use. In that time the excess liquid will evaporate making the bar hard and the lye will be converted and no longer caustic
So now I have sixteen nice big bars of soap and 32 half size bars of soap all curing on baking racks. I cut the boys bars in half hoping it will be easier for them to use. I need to do all I can to encourage them to use soap. It’s a boy thing.
Disclaimer: I’m not a scientist nor am I an expert soap maker. So please excuse my simplistic explanations. Both web sites I mentioned go into much more detail than I have done here.
But hey, if I can make soap you can to.
Enjoy your Monday! It’s the first one of spring you know.
Karen
This is seriously so cool. I would love to make soap!
It is really very easy. You just have to be careful. Doing it once you get the flow of things and then it is a piece of cake.
Enjoy the day,
Karen
I too make soap and love it. Your explanation is very good. And yes, store soap is detergent. Do you use the ‘soap saver’ little thingy in your soap dishes to keep the soap above any water? Are you familiar with Oregon Trail soap making supplies in S. Oregon? The owner, Suz also has an online soapmaking discussion group, Red Barn. It’s been pretty quiet but easy to start discussions or ask for advice or share knowledge. Because of my move last summer all my equipment is in storage but hopefully I can get back to it late summer. So very nice to see this post and so very accurate….there are others out there that are dangerous and misleading. How refreshing.
Thank you! It is nerve wracking to give even minimal instructions in something like this. I appreciate the feed back.
There is a new soap making supply store in Milwaukie/Happy Valley area. Just 10 min from where we used to live! They have great prices and if I shop when I am in town no shipping cost.
The name is “Handcrafters Supply” which is part of The Shay Company (large volume). Here is their website: http://www.shayandcompany.com/home.php
It is so nice to have somewhere to buy it that I don’t have to pay shipping.
Thanx for the Oregon Trail info. I’ll check it out as well as the Red Barn.
Yes, in the shower and at the kitchen sink I have dishes that keep the soap out of water.
I hope you still have soap leftover from the last time you made it.
Thanx again for the affirmation!
Karen
Thank you for the heads up on the source for supplies. I’m in Salem but get to Oregon City and that part of the county often. Shay Co. is well known in the soaping world. I meant to compliment you on how light colored your milk soap turned out….a real accomplishment working with milk. And while my own soap is gone I do buy from soap makers at craft shows or venues and often buy from them online to see and try their creations. It’s almost an addiction and I have a large supply 🙂
I loved seeing your soap making today, thank you. My friend Julie and I have talked about soap making for several years now. (Together we have thirteen children. She has nine, just sounds dramatic to say it that way!) So anyway, her family makes baskets for all their relatives for Christmas with handmade items inside. She’s wanted to make soap for the baskets, and I’ve wanted to make it for Christmas and stocking gifts too. I’ll tell her about your post, this gives me new hope that maybe we could actually do it this year. Many thanks for the inspiration!
It is really easy. You just need to be safe with the lye (read a post where a seasoned soap maker’s two year old son spilled a bunch over his head!) and watch your temperatures. With milk soap (replacing the water with milk) you want to freeze the milk first. With regular soap (lye mixed with water) you want the oils and the lye to be close to or a little under 100 degrees. I would melt the oil first then do the lye and let it cool. Oil can be warmed. Lye can’t. I really like soap makers resource. I had a question the day we were making it and I called and got an answer right away. Plus they have some great recipes. Yes, with so many kids you two should join together and make as much as you can from scratch. There are shampoo recipes, liquid soap recipes, bug repellent and who knows what else.
I hope you both give it a try. I include homemade soap along with canned goods in my gift baskets to family. They love it.
Sounds wonderful, thanks for the great tips!!!
It’s so nice to learn that you made soap with goat milk. What is your recipe?
We use homemade soap, shampoo, and laundry soap exclusively. It is completely different quality from the store-bought stuff. I think if I stop making soap, my family will go dirty. No pressure though, I love making soaps.
I am so happy that you had a good time making your own soap. It’s good for everybody, especially for Nicholas.
Thank you for sharing your happy moments.
Kimberly
Isn’t everything homemade better. Just waiting for it to cure.
Take care,
Karen
Can goat milk soap be made without lye?
Lye is an essential ingredient in soap.I don’t know of a way to make soap without lye.
Karen