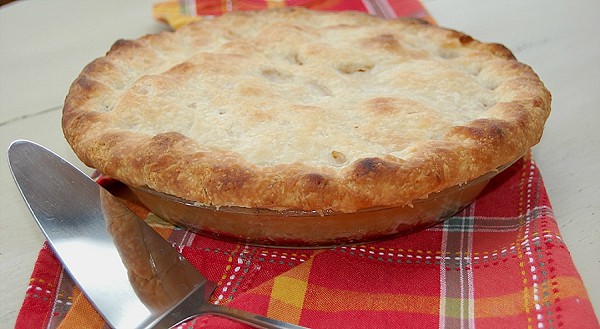
You are going to be so happy I shared this Cooks Illustrated Foolproof Pie Dough. Why? Because if is FOOLPROOF of course.
So I’ve shown you how to make your own pumpkin puree. Now I’ll give you a great recipe for pie crust.
There was a time when I dreaded trying to make a pie. It was the dough. So hard to roll out and get it the right size without a bunch of cracks.
One of my issues of “Cooks Illustrated” included a recipe for”Foolproof Pie Dough”. Cooks Illustrated is my most trusted “go to” place for recipes. I gave it a try. To my astonishment, I made a great pie crust and there was no frustration.
Over the years of making pies, mostly during the holidays, I’ve learned a few things that have helped me continue with my success. In addition to the recipe I’m going to share those things I’ve learned.
I love using scales when baking. One of the reason I love Cooks Illustrated recipes is they include the weight of the ingredients. If you don’t have scales you only need to worry about the flour. To assure the proper amount of flour DO NOT SCOOP. Fluff your flour with a spoon and then spoon it into the measuring cup. Level with a knife.
I use a food processor to make my pie dough but if you don’t have one there is no reason why you can’t use a pastry blender, or for that matter, a couple of forks. This is what the mixture should look like when it is done.
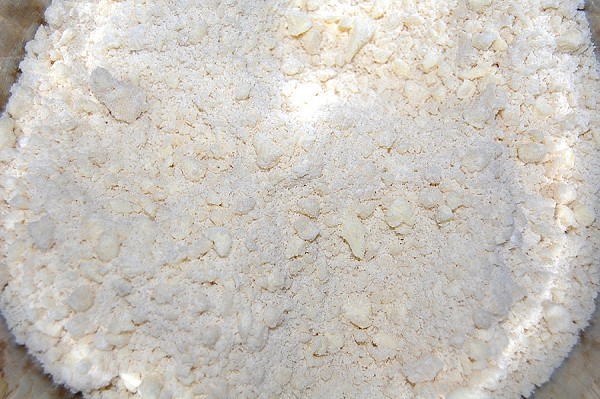
Those clumps are necessary for the dough to turn out flaky. When the heat hits the clumps of fat (butter or shortening), the fat expands which creates layers.
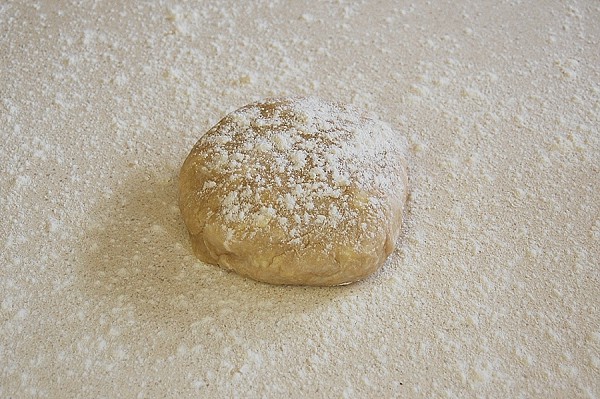
Once you have the dough mixed up you form it into a ball then flatten into a disc. Wrap it in plastic wrap and put it in the refrigerator for at least 45 minutes.
One of the key things to a great pie dough is keeping everything cold. I took a pie class at a Sur La Table once and the owner/baker of “Grand Central Baking” was our instructor. She talked about the importance of everything being cold. If the fat is warm it will melt and you won’t have those clumps which means you won’t get that expansion and you will end up with a crust that doesn’t have flaky layers. They go so far as to not turn the heat on in their bakery during those early morning hours while they are making their pastry.
Too keep things cold, it is best to get all your ingredients ready before you start mixing. The official term is called “mise en place”, which simply means “putting in place”. I enjoy cooking/baking better when I have the time to do this. Yes, it does make more dishes to clean.
When I cut my butter and shortening for the dough I put it all in a bowl and put it in the refrigerator or freezer until I get everything ready. I also do that with the liquid. I measure it out and then stick it in the refrigerator or freezer until I’m ready to use it.
Marble or Granite counter-tops are great for rolling out dough because they stay cool. If you don’t have those (like me) and you are concerned that your area is too warm you can use a trick. The night before place a cookie sheet in the freezer (level) and pour cold water into it to almost full. The next day, use the frozen water filled cookie sheet to keep your counter and dough cool.
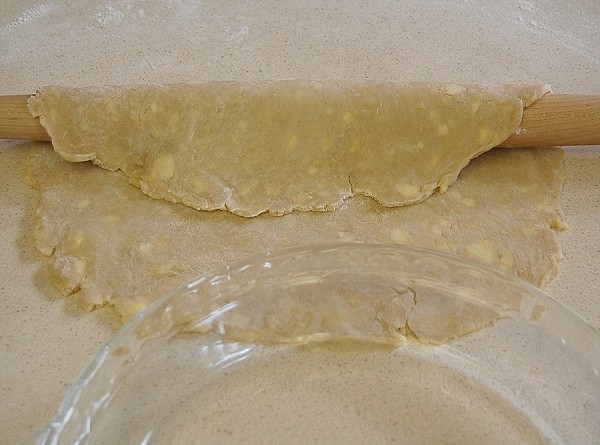
When I roll out my dough I don’t roll back and forth. I start in the middle and roll away from me. Then I turn it a quarter of a turn and roll away from me again. In other words, I’m only rolling in one direction. Also, the frequent turning of the dough circle keeps it from sticking and lets you know if you need to add more flour underneath. For a standard 9-inch pie plate you will need to roll it out to a 13 inch circle. If is a deeper pie plate make that a 14 inch circle.
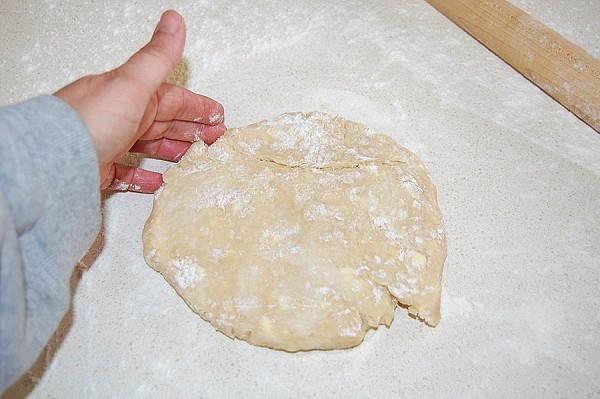
Transferring the rolled out dough to the pie plate can be nerve wracking. Try this trick. Using your rolling pin, loosely roll the dough on it, then unroll it over your pie plate.
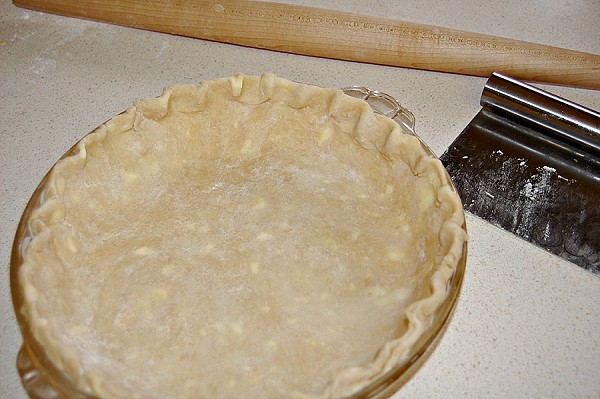
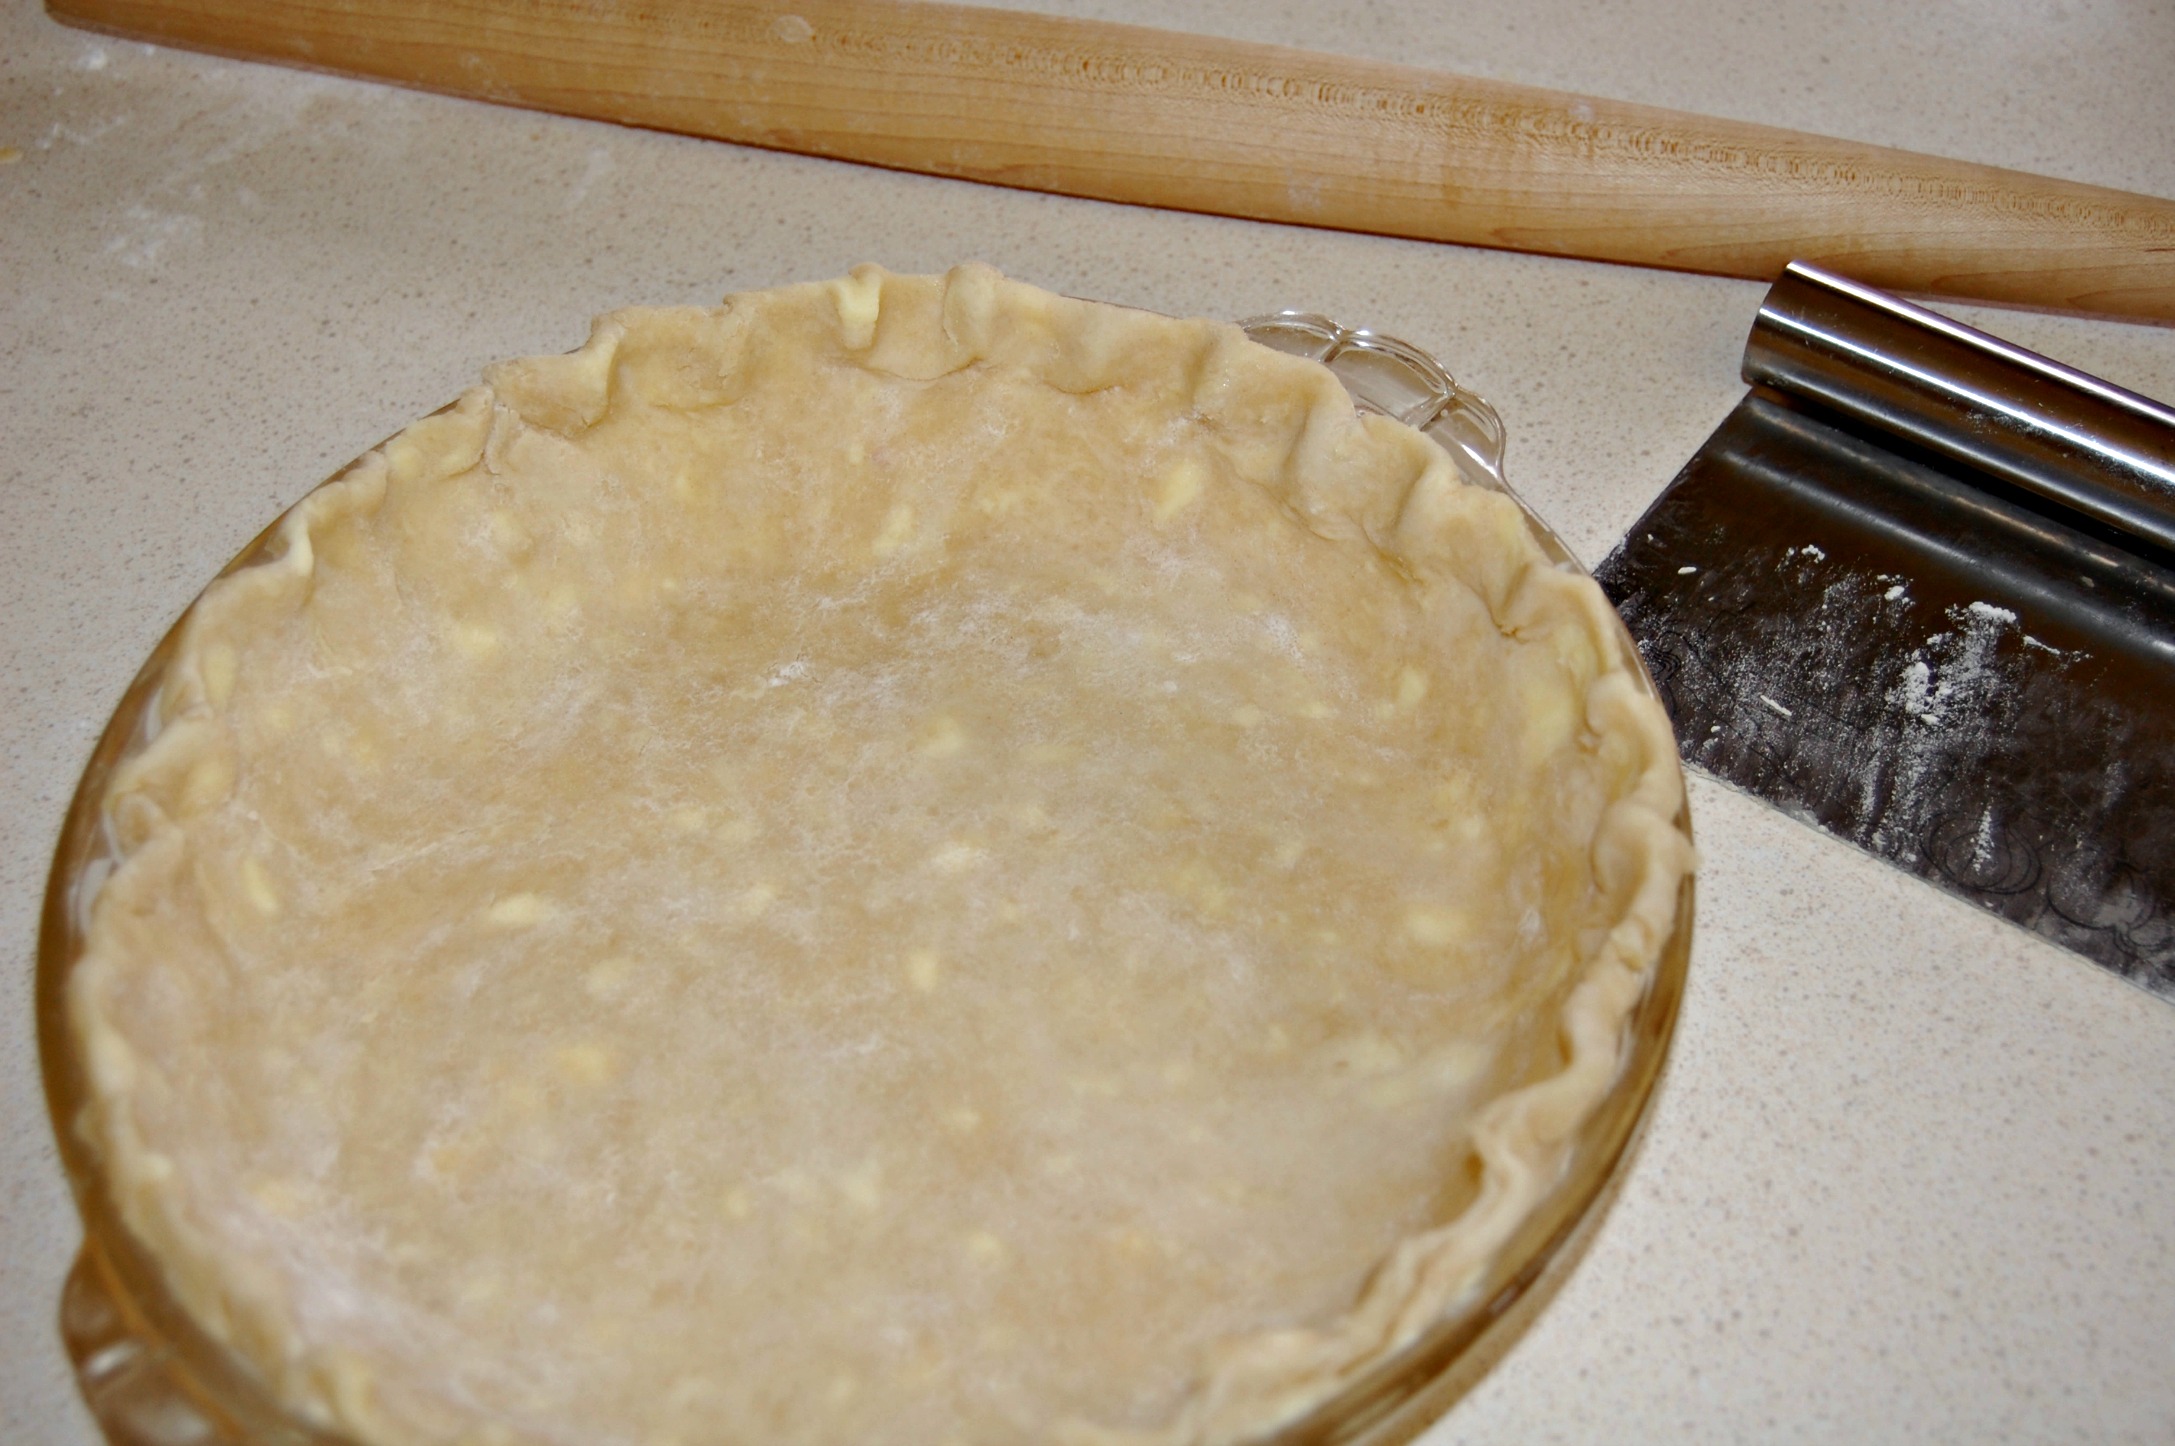
Now comes another tricky part, making the edges look pretty. You will most likely have more dough than you need for this so you cut a little off and tuck the rest under to create a thicker layer around the edges. If you have a short spot you can always add some of the dough you cut off to that spot.
The easiest thing to do is press down, all the way around, with the tines of a fork. I usually do it this way: space my thumb and pointer finger about an inch apart, using the pointer finger on my other hand, I press the dough between the thumb and pointer finger. It is called a “fluted crust” and there are videos that show how to do it. Remember, homemade pies look “rustic”. Store bought pies look machine made, because they are machine made.
Lastly, put that pie plate back in the refrigerator until you’re ready to fill it.
A crust that is flavorful and flaky is our goal. Shortening makes the most flaky crust. Butter makes a delicious crust. It is best to use both. This recipe does that.
Give this recipe a try. Everyone who eats a pie with this crust raves over it.
Cook's Illustrated Foolproof Pie Dough
Ingredients
- 1 1/4 cups unbleached all-purpose flour 6 1/4 ounces
- 1/2 teaspoon table salt
- 1 tablespoon sugar
- 6 tablespoons cold unsalted butter 3/4 stick, cut into 1/4-inch slices
- 1/4 cup chilled solid vegetable shortening cut into 2 pieces
- 2 tablespoons vodka cold
- 2 tablespoons water cold
Instructions
- To ensure the butter and shortening are cold when you add them to the flour, slice and put into a bowl, then put the bowl into the refrigerator or freezer until needed. Likewise with the liquids. Measure your water into a cup then the vodka and put the cup into the refrigerator or freezer (because of the vodka it will not freeze completely).
- Measure out you flour and put 3/4 of a cup into a food processor. Add you salt and sugar. Give two quick pulses to combine.
- Add your butter and shortening to the bowl of the processor. Process for about 10 seconds. All of the flour should be coated at this point. Scrape down the sides of the bowl to redistribute the butter and shortening. Add the rest of the flour. Pulse mixture until you can still see small size pieces of butter in the flour (about 6 one second pulses).
- Dump flour/fat mixture into a bowl and drizzle the vodka/water liquid over it.
- Use a spatula to mix the flour and liquid. You will need to do more pressing than mixing to incorporate the liquid.
- Dump the mixture onto a large piece of plastic wrap. Using the plastic wrap to help, form it into a disc (should be about four inches wide).
- Put disk (wrapped in plastic wrap) into the refrigerator for at least 45 minute or up to two days.
Notes
Not only is this pie dough a breeze to work with but it taste amazing. Shortening is great for flakiness (butter is too) but the butter adds great flavor.
I need to try this with the girls. I have to put aside my fears and just do it! Thanks for sharing. I will let you know how it goes.
Hugs,
Lisa
It makes it so much easier. You can actually call the vodka, “momma’s little helper.” 🙂
xoxo,
Karen
Dear Karen, I love Cook’s Illustrated too. I used to have a subscription but it lapsed. So this is an amazing pie crust recipe and I need to try it. Have never heard of using vodka. So intriguing. Thanks for this great recipe and have an awesome weekend!
I love this recipe. No stress anymore when I want to make a pie.
Take care,
Karen
Hi – I’ve been making the Cook’s Illustrated pie crust recipe with vodka for years and it has been absolutely perfect! This Thanksgiving I intended to make 2 pies but I couldn’t find my recipe…no problem – I looked it up on line – found it on this site and made the recipe twice. After leaving it in the fridge for 45 mins I attempted to roll it out – EEK! It would not roll out – it stuck to the rolling pin and counter no matter how much flour I used. Long story short – the original recipe calls for 2 1/2 cups of flour while your recipe calls for 1 1/4 cups of flour…NO WONDER I couldn’t roll it out!
This did not totally ruin Thanksgiving, but it did totally ruin the majority of the day I was to make the pies!
PLEASE correct the error on your site so no one else has to go thru the Thanksgiving trauma I endured! Eileen
Hi Eileen, sorry you had trouble. But according to my records, and multiple sources online, the ratios we have listed are correct. I do see that some websites have the quantities doubled, which list the flour at 2 1/2 cups, but they also double all the other ingredients also. We have used this recipe countless times as listed with no problems, so will leave it as-is. Thanks.
Hi there. Made this for the first time this morning I presume one and a quarter cups of flour is for one pie crust not a double pie crust.